Building & Testing Lambda@Edge Functions with LocalStack


AWS FOR THE REAL WORLD
⏱️
Reading time: 8 minutes
🎯
Main Learning: Building & Testing Lambda@Edge Functions with LocalStack
πŸ“
Hey Reader πŸ‘‹πŸ½

we hope you have a great week! End of last year the CDN Edgeio was deprecated. Tobi's client company used it and the only thing that saved his day was CloudFront and Lambda@Edge Functions. But we realized that testing them and executing them locally is a pain. When we started to look for a solution we found Localstack - let's see how we can use it to debug our functions.

Introduction

Let's be honest: debugging CloudFront or Lambda@Edge functions is still a pain.
Even in 2025, you'll need to wait for deployments to finish.
If you've made the slightest mistake, your function will probably break your whole deployment.

With LocalStack, this changes.
You can build, test, and debug your Lambda@Edge functions locally!

In this blog post, we'll look at how to do this.

LocalStack Setup

Getting started with LocalStack is easy.
We just need to install the LocalStack CLI.

On macOS, you can install it using Homebrew:

TERMINAL
brew install localstack/tap/localstack-cli

The tutorials for other operating systems can be found on the official documentation.

After the installation, let's check if LocalStack is running:

TERMINAL
localstack --version LocalStack CLI 4.4.0

If you see something like this, you're good to go!
Let's start LocalStack:

TERMINAL
localstack start

Info: You can also run LocalStack in detached mode by adding the -d flag: localstack start -d.
This will start LocalStack in the background, allowing you to continue using your terminal for other commands.

This will pull the latest docker image and start LocalStack.

LocalStack Starting

LocalStack will print a Ready message and you can access the dashboard via app.localstack.cloud.

We'll need to create an account to use the dashboard.
Fortunately, LocalStack is free to use and you can sign up via your existing GitHub account in a few seconds.

Afterwards, let's continue with the set up by clicking on the Getting Started link in the navigation bar.
This will take us to the page where we can find our Auth Token that we need to export.

LocalStack Auth Token

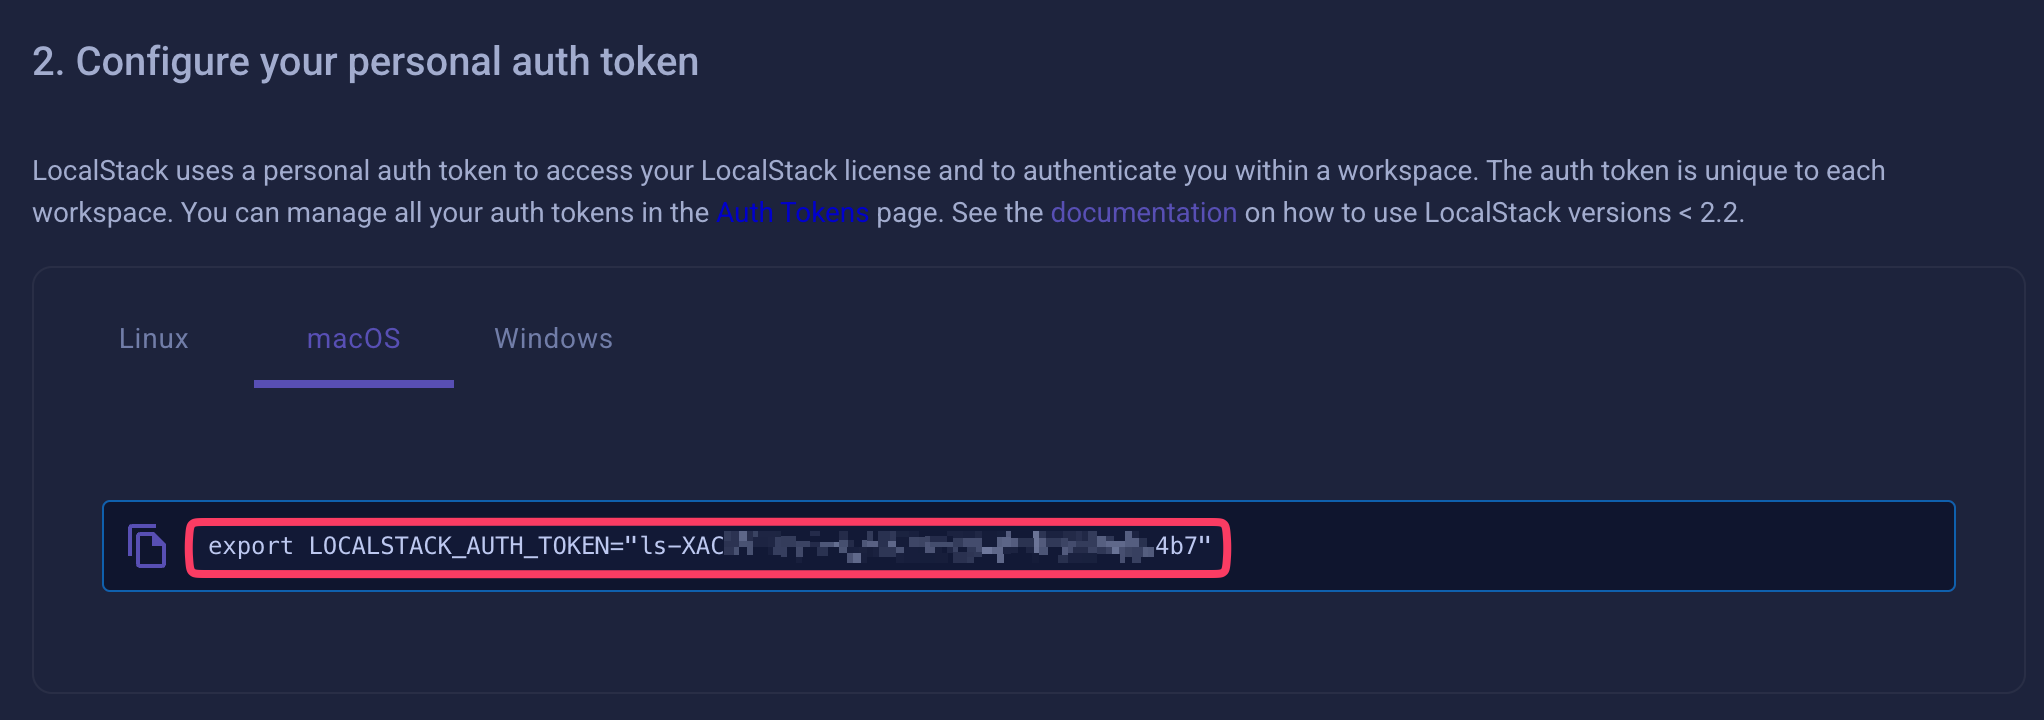
We can now export the Auth Token:

TERMINAL
export LOCALSTACK_AUTH_TOKEN=

This will set the Auth Token for LocalStack.
At best, you should add this to your .bashrc or .zshrc file to have it automatically set when you open a new terminal.

Upgrading our License to the Base Plan

For using CloudFront, we need to upgrade our license to the base plan.
Only certain services are required to be on a paid plan. Generally, LocalStack is free to use for most AWS services.

Let's jump to the pricing page of LocalStack and click on the Base plan.
Afterwards, just click on the confirmation button to get our license upgraded.

Don't worry: the Base Plan can be tested for 14 days for free!
We don't even need to provide our credit card information.

Please restart LocalStack after adding your Auth Token and upgrading your license.

Afterwards, you should also see that your local instance is running the dashboard!
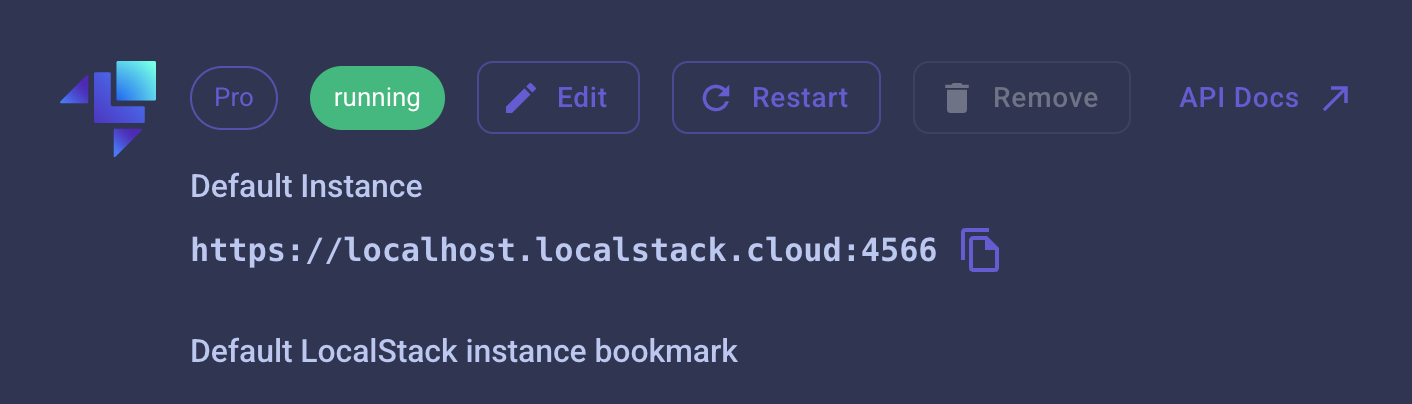
LocalStack Dashboard showing our running instance

Using the LocalStack CLI

Now we're ready to use the LocalStack CLI.

It's a powerful tool that allows us to manage our LocalStack resources.
Before we jump into our Lambda@Edge functions, let's create a simple S3 bucket first.
Just to get into the vibe of LocalStack.

Let's create a bucket:

TERMINAL
aws s3 mb s3://cloudfront-origin-bucket --endpoint-url=http://localhost:4566

Instead of sending the command to the real AWS API, it will be redirected to our locally running LocalStack instance.

In the terminal window where LocalStack is running, you should see something like this:

TEXT
2025-05-10T13:11:53.934  INFO --- [et.reactor-0] localstack.request.aws     : AWS s3.CreateBucket => 200

This means that the bucket was created successfully.

Let's list our buckets to verify that:

TERMINAL
aws s3 ls --endpoint-url=http://localhost:4566
2025-05-10 15:11:53 cloudfront-origin-bucket

Yay, our setup works as expected and our bucket is listed!

You can also install awscli-local to have a shorter command to interact with LocalStack.

TERMINAL
brew install awscli-local

This will install the awslocal command and set the endpoint to the LocalStack instance.

TERMINAL
awslocal s3 ls

This will list our buckets as expected - no need to pass the specific endpoint anymore.

Creating a Lambda@Edge Function

Before we want to create our CloudFront distribution, we need to create our Lambda function first.
Let's create one via the CLI.

What do we need for this?

  • A trust policy that allows Lambda and Lambda@Edge to assume the role
  • A role that will be used by the function
  • The handler code that will be executed when the function is invoked
  • The function itself with our attached policy and role

Let's start with the trust policy.

TERMINAL
echo '
{
  "Version": "2012-10-17",
  "Statement": [
    {
      "Effect": "Allow",
      "Principal": {
        "Service": [
          "lambda.amazonaws.com",
          "edgelambda.amazonaws.com"
        ]
      },
      "Action": "sts:AssumeRole"
    }
  ]
}
' > trust-policy.json

Next, we'll create the role that will be used by the function.
We'll also attach the AWSLambdaBasicExecutionRole to the role.

TERMINAL
awslocal iam create-role \
   --role-name cloudfront-edge-function-role \
   --assume-role-policy-document file://trust-policy.json
awslocal iam attach-role-policy \
  --role-name cloudfront-edge-function-role \
  --policy-arn arn:aws:iam::aws:policy/service-role/AWSLambdaBasicExecutionRole

Now we can put our handler code into a file.

TERMINAL
echo 'exports.handler = async (event) => {
  if (event?.Records?.[0]?.cf?.request) {
    const request = event.Records[0].cf.request;
    console.log(request);
    return request;
  }
  return {
    statusCode: 200,
    body: JSON.stringify(`Hello, World!`),
  };
};' > handler.js

If the request originates from CloudFront, the event.Records[0].cf.request will be present.
In this case, we need to return the request because else we'll get an error from CloudFront.
That's just the starting point - we'll modify it later to do something useful.

If it's any other invocation, we'll simply return a HTTP 200 and a static message.

Great! Now we can actually create the function.
Before that, we need to zip our handler file.

TERMINAL
zip function.zip handler.js
awslocal lambda create-function \
   --function-name cloudfront-edge-function \
   --runtime nodejs22.x \
   --role arn:aws:iam::000000000000:role/cloudfront-edge-function-role \
   --handler handler.handler \
   --zip-file fileb://function.zip

This will create the function and print the whole configuration in the response.
At best you'll already copy the ARN from the response as we'll need it later on.

Let's test our function by invoking it.

TERMINAL
awslocal lambda invoke --function-name cloudfront-edge-function \
    --cli-binary-format raw-in-base64-out \
    --payload '{"body": "quot;num1quot;: quot;10quot;, quot;num2quot;: quot;10quot;}" }' output.json

This will invoke the function and print the response in the output.json file.

Let's use cat and jq to print the content of the file:

TERMINAL
cat output.txt | jq
{
    "statusCode": 200,
    "body": "quot;Hello, World!quot;"
}

This will print the response in the output.json file.

Now that this works, let's update the function in a way so that we can use it in our CloudFront distribution.

TS
exports.handler = async (event) => {
    const response = event.Records[0].cf.response;
    response.headers['x-from-lambda'] = [
        {
            key: 'x-from-lambda',
            value: new Date().toISOString(),
        },
    ];
    return response;
};

Let's now create the zip file again with the new code and update the function.

TERMINAL
zip function.zip handler.js
awslocal lambda update-function-code \
   --function-name cloudfront-edge-function \
   --zip-file fileb://function.zip

As only published functions can be attached to a distribution, we need to publish our function first.
Let's do that via the CLI too:

TERMINAL
awslocal lambda publish-version \
   --function-name cloudfront-edge-function

This will publish the function and print the version.
A versioned function always has an ARN that ends with number, e.g. :1.

Any new publish will increase the version number, which means we need to update our distribution configuration.

Creating a CloudFront Distribution

Now we're ready to create a CloudFront distribution.

Let's create a simple dist-config.json configuration file that we can pass with the creation request:

JSON
{
    "CallerReference": "unique-string-20250513-01",
    "Comment": "My distribution with Lambda@Edge",
    "Enabled": true,
    "Origins": {
        "Items": [
            {
                "Id": "my-origin-1",
                "DomainName": "cloudfront-origin-bucket.s3.amazonaws.com",
                "OriginPath": "",
                "S3OriginConfig": {
                    "OriginAccessIdentity": ""
                }
            }
        ],
        "Quantity": 1
    },
    "DefaultCacheBehavior": {
        "TargetOriginId": "my-origin-1",
        "ViewerProtocolPolicy": "redirect-to-https",
        "AllowedMethods": {
            "Quantity": 2,
            "Items": ["GET", "HEAD"],
            "CachedMethods": {
                "Quantity": 2,
                "Items": ["GET", "HEAD"]
            }
        },
        "ForwardedValues": {
            "QueryString": false,
            "Cookies": {
                "Forward": "none"
            }
        },
        "LambdaFunctionAssociations": {
            "Quantity": 1,
            "Items": [
                {
                    "LambdaFunctionARN": "arn:aws:lambda:us-east-1:000000000000:function:cloudfront-edge-function:1",
                    "EventType": "viewer-response",
                    "IncludeBody": false
                }
            ]
        },
        "MinTTL": 0
    }
}

Make sure to put your correct versioned function ARN in the LambdaFunctionARN field.
Also make sure that the OriginDomainName is correct!

In this distribution, we're using the type viewer-response which means that the function will be invoked when the response is sent to the viewer.

Now we're ready to create our distribution:

TERMINAL
awslocal cloudfront create-distribution \
   --distribution-config file://dist-config.json \
  | jq -r '.Distribution.DomainName'

This will create a new distribution and print the domain name of the distribution.
In our example case it's aaac6b4e.cloudfront.localhost.localstack.cloud.

Let's put a simple HTML file into our bucket and see if it's working.

TERMINAL
echo 'Hello, World' > index.html
awslocal s3 cp index.html s3://cloudfront-origin-bucket/index.html --acl public-read

This will upload the file to our bucket and set the ACL to public-read.

Let's try to access the file via the CloudFront distribution:

TERMINAL
curl https://aaac6b4e.cloudfront.localhost.localstack.cloud/index.html
Hello, World

This should return the content of the index.html file.
We can also access this URL directly in the browser.

Info: If you get an error, you may need to use the right DNS server.
The localhost.localstack.cloud domain is publicly registered if you're using Google's or Cloudflare's DNS servers.
On macOS you can search DNS Server in the settings menu and just add 8.8.8.8 and/or 1.1.1.1 as additional DNS servers.

Let's check if the response contains the x-from-lambda header:

TERMINAL
curl -I https://aaac6b4e.cloudfront.localhost.localstack.cloud/index.html
HTTP/2 200
server: TwistedWeb/24.3.0
date: Tue, 13 May 2025 05:39:55 GMT
content-type: application/xml
x-amz-bucket-region: us-east-1
x-amz-request-id: 718e313d-9a6b-4e95-8595-114b4349041d
x-amz-id-2: s9lzHYrFp76ZVxRcpX9+5cjAnEH2ROuNkd2BHfIa6UkFVdtjf5mKR3/eTPFvsiP/XV/VLi31234=
content-length: 0
x-from-lambda: 2025-05-13T05:39:55.427Z

Great! Our function is working as expected.

Let's also check that our created distribution, S3 bucket and Lambda function are listed in the dashboard.

Let's click on
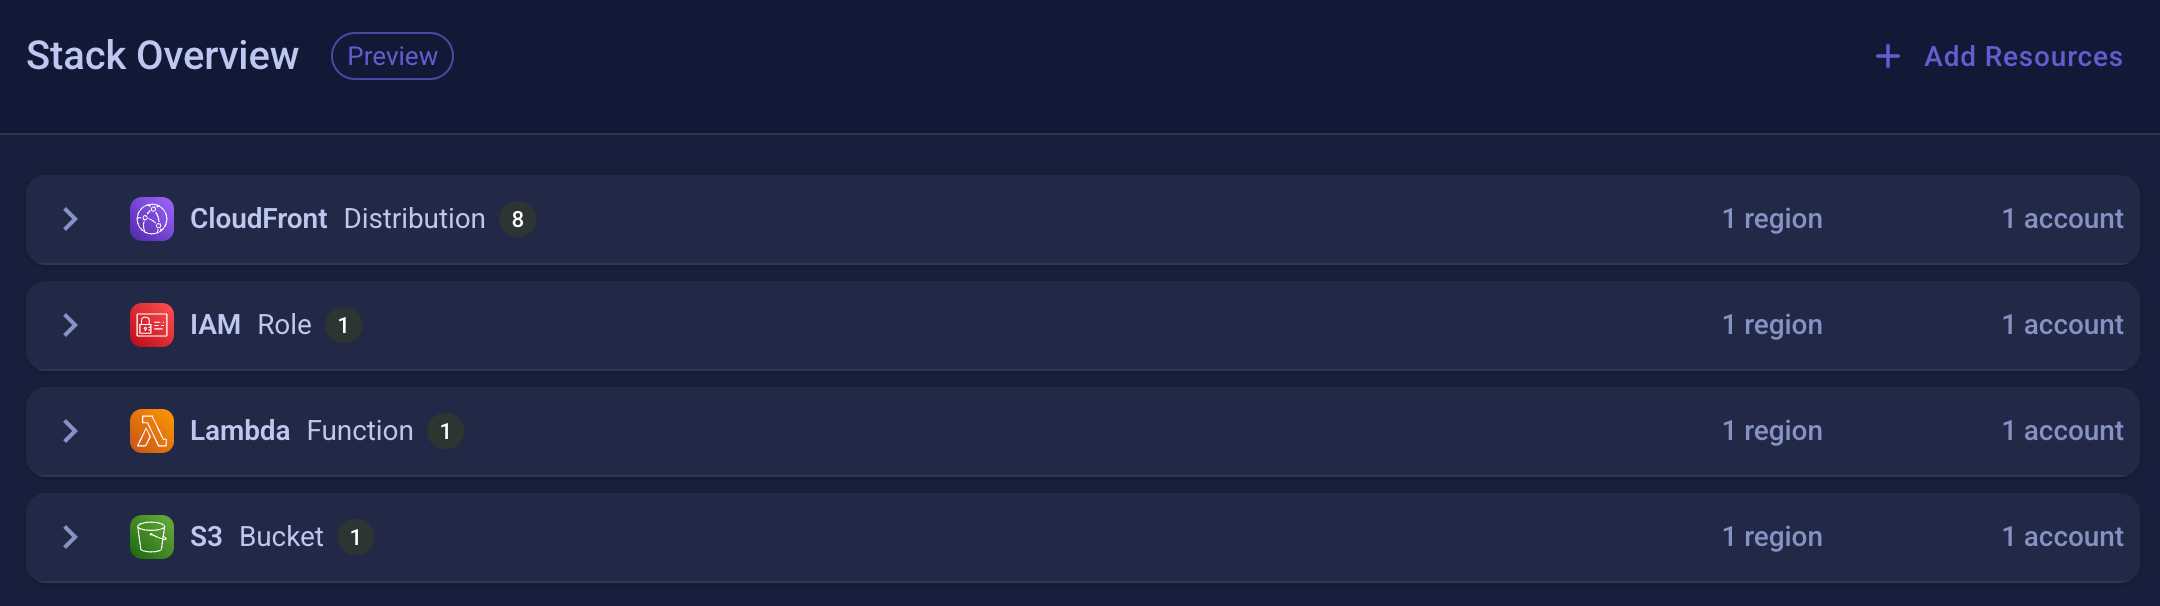
 LocalStack Instances in the navigation bar and then go to the Overview tab.

Resources shown in the LocalStack Dashboard

Iterating our Lambda@Edge Function

Now that we know that our function is working as expected, let's iterate on it.

Let's say we want to add a new header to the response.

What do we need to do?

  1. Update the handler code
  2. Create a new zip file
  3. Update the function
  4. Publish a new version
  5. Create a new distribution with the new configuration

Currently, LocalStack does not support updating the distribution's Edge Function configuration via the CLI.
But as we have LocalStack and resource creation only takes milliseconds, we can just create as many new distributions as we want.

Let's change our handler code to add another new header:

TS
exports.handler = async (event) => {
    const response = event.Records[0].cf.response;
    response.headers['x-from-lambda'] = [
        {
            key: 'x-from-lambda',
            value: new Date().toISOString(),
        },
    ];
    response.headers['x-hello-world'] = [
        {
            key: 'x-hello-world',
            value: 'Hello, World!',
        },
    ];
    return response;
};

Now, we need to create a new zip file and update the function:

TERMINAL
# Zipping our handler
zip function.zip handler.js
# Updating the function
awslocal lambda update-function-code --function-name cloudfront-edge-function --zip-file fileb://function.zip
# Publishing a new version
awslocal lambda publish-version --function-name cloudfront-edge-function

Now we just need to put the new version ARN into our dist-config.json file.
Afterward, we can create a new distribution with the new configuration.

TERMINAL
awslocal cloudfront create-distribution \
   --distribution-config file://dist-config.json \
  | jq -r '.Distribution.DomainName'

Let's run our cURL command again to see the new header:

TERMINAL
curl -I https://bfdc9aaa.cloudfront.localhost.localstack.cloud/index.html
HTTP/2 200
server: TwistedWeb/24.3.0
date: Tue, 13 May 2025 05:39:55 GMT
content-type: application/xml
x-amz-bucket-region: us-east-1
x-amz-request-id: 718e313d-9a6b-4e95-8595-114b4349041d
x-amz-id-2: s9lzHYrFp76ZVxRcpX9+5cjAnEH2ROuNkd2BHfIa6UkFVdtjf5mKR3/eTPFvsiP/XV/VLi31234=
content-length: 0
x-from-lambda: 2025-05-13T05:39:55.427Z
x-hello-world: Hello, World!

Awesome! We've just iterated on our Lambda@Edge function in a few seconds.
Without having to wait minutes for the deployment to finish.

Also, without the risk of breaking anything real.

πŸ’‘ Tip: By the way, if you're on the dashboard's root page, you can also see a small overview of your stack's resources.

Resources shown in the LocalStack Dashboard

Conclusion

In this blog post, we've looked at how to build, test, and debug Lambda@Edge functions with LocalStack.

We've created a simple CloudFront distribution and Lambda@Edge function and iterated on it in a few seconds.

Doing this with a real distribution would take several minutes.
With LocalStack, we've done this in a few seconds.

And LocalStack doesn't stop here.
There are many more services that are supported and you can find more information on the official documentation.

Summary

That's it for this newsletter! We showed how to use LocalStack to build, test, and debug Lambda@Edge functions locally in your own terminal, so you can cut down those painful CloudFront waits and dodge those oh-no deployment breaks. Have you given LocalStack a spin yet?

See you soon πŸ‘‹πŸ½ Sandro & Tobias

AWS for the Real World

Join our community of over 9,300 readers delving into AWS. We highlight real-world best practices through easy-to-understand visualizations and one-pagers. Expect a fresh newsletter edition every two weeks.

Read more from AWS for the Real World

AWS FOR THE REAL WORLD ⏱️ Reading time: 8 minutes 🎯 Main Learning: Migrating from Edgio to CloudFront πŸ“ Blog Post πŸ’» GitHub Repository Hey Reader πŸ‘‹πŸ½After a busy week in Prague, both Tobi and I (Sandro) delivered our talks and we got quite some good feedback! We will share them in a separate newsletter soon.But this newsletter is all about accessing S3 within a VPC via Gateway endpoints vs. Internet routing. We know these networking issues are not the fanciest onces (looking at you AI) but...

Hey Reader πŸ‘‹πŸ½ We've been talking a lot about how great SST's switch to Pulumi was, and many of you have asked us how to use plain Pulumi directly. So today, we're sharing our quick guide to Pulumi - a tool we're really excited about since it lets us build infrastructure with languages we already know and love. No more learning weird syntax - just TypeScript, Python, or whatever we're comfortable with! We spent the last few days playing with it, and here's what we've learned... AWS Community...

Newsletter Header AWS FOR THE REAL WORLD ⏱️ Reading time: 8 minutes πŸŽ“ Main Learning: Migrating from Edgio to CloudFront ✍️ Blog Post πŸ’» GitHub Repository Hey Reader πŸ‘‹πŸ½ this newsletter is about πŸ₯ AI πŸ€– We haven't talked too much about AI, Bedrock, MCPs, and agents yet - so we want to change that. Please let us know if this it interests you to build AI on AWS, or if you are much more interested on hands-on fundamentals services. Should we focus on AI Services? Yes, I want to learn to build...